

Official Coeiroink download page: COEIROINK
COEIROINK is free. Make sure you read the terms for each character and be sure to credit the voice bank you use.
(Note: The CPU version only has one file to download via BOOTH (needs Pixiv account) or Dropbox. But I'm talking about the GPU version for this tutorial since I have an NVIDIA graphics card.)
The GPU version needs NVIDIA CUDA 12.8 installed beforehand. Link to the NVIDIA Developer website: CUDA Toolkit 12.8 Downloads
If you download COEIROINK from BOOTH, it involves downloading 4 files that you have to manually put in the same folder and you specifically need PeaZip for it, but it all comes as 1 regular zip if you download via Dropbox. So I recommend using the Dropbox link to save time.
1) Have all of the files in the same folder:
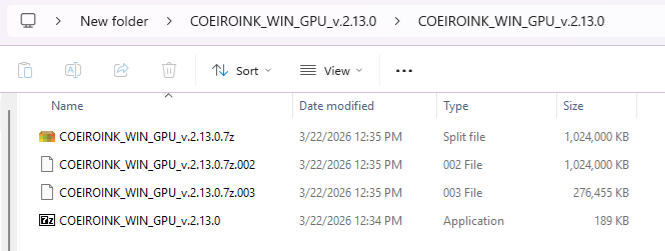
2) Run COEIROINK_WIN_GPU_v.2.13.0.exe. Let the command prompt that pops up work.
3) A new folder called "COEIROINK_WIN_GPU_v.2.13.0" will be added.
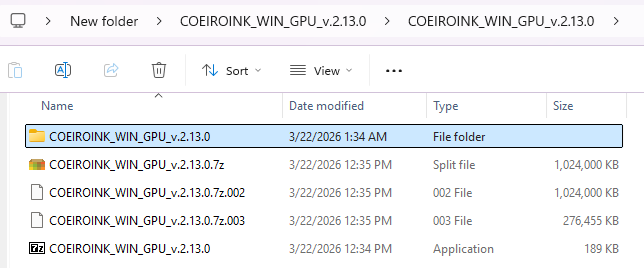
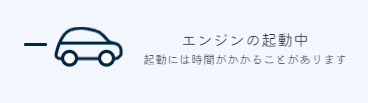
4) Inside the new folder is COEIROINKv2.exe, run it. There will be a message that says the engine is starting up.
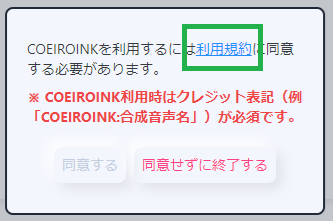
5) A pop-up appears asking that you agree to credit COEIROINK when you make content using it. Click the blue hyperlink, it will make the Terms And Conditions page appear in your browser. Doing so enables the 同意する (Consent) button.
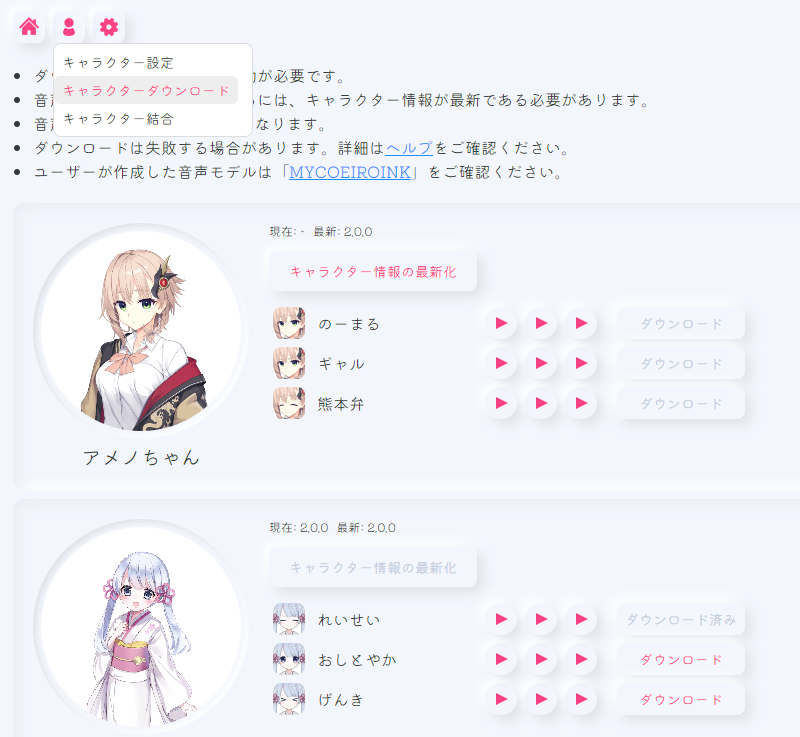
6) If you click the picture of the person in the upper left, there is an option to download (ダウンロード) voices that are listed on the Characters portion of the official website.
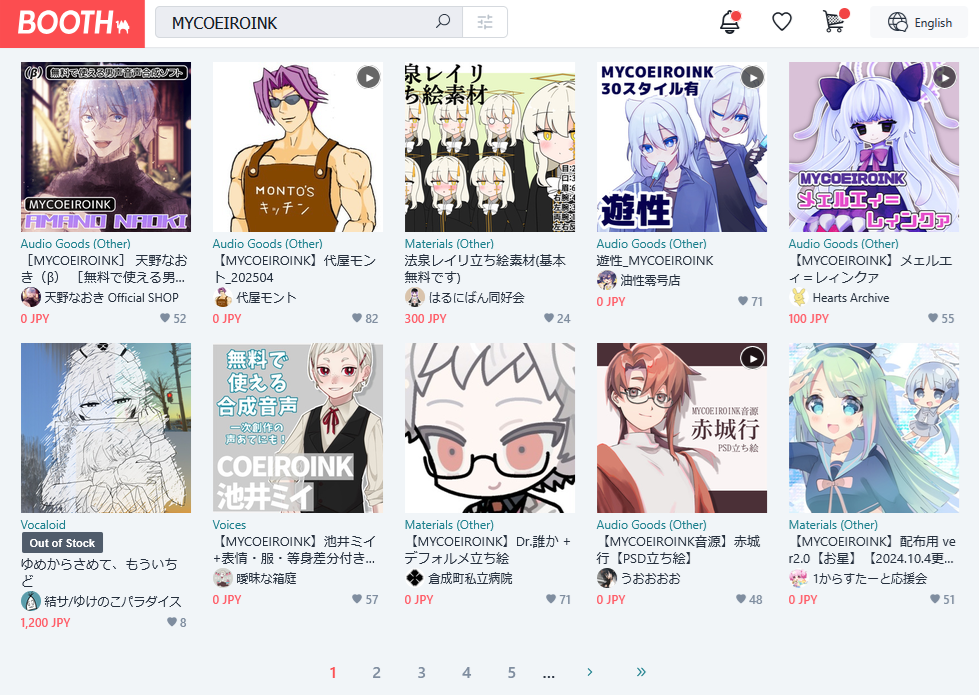
7) However, there are actually more characters you can download on BOOTH if you search for "MYCOEIROINK". (This search term includes many free voices, but some are paid. You might also see 立ち絵 artwork you can use for your videos.)
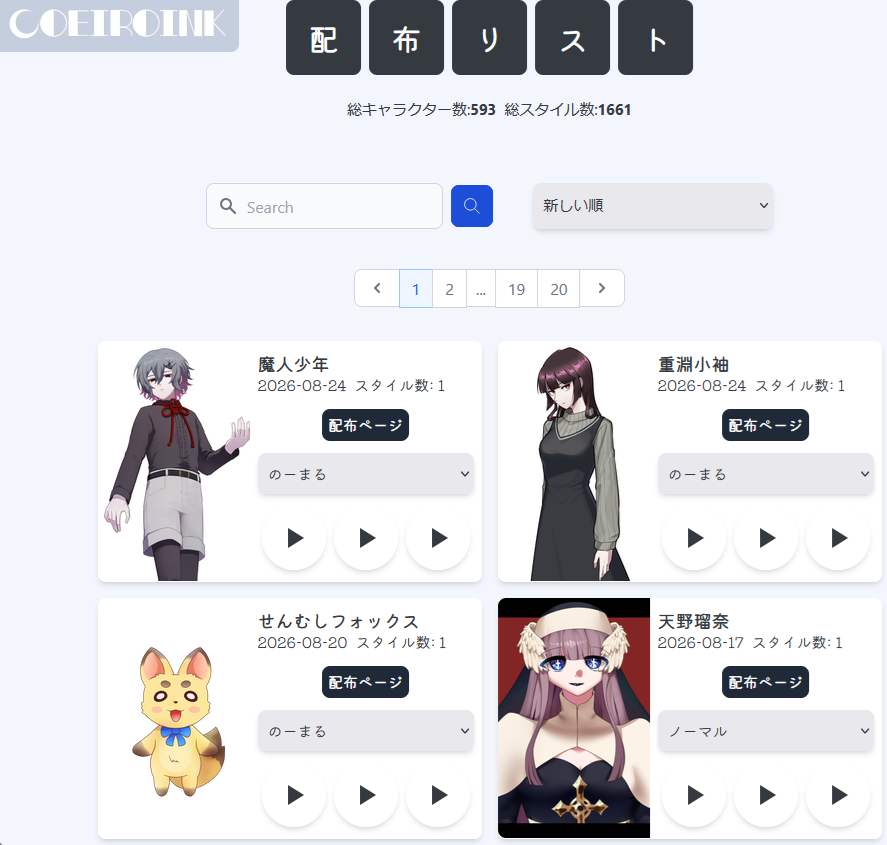
You can also see voices on the MYCOE page of the official website.
作る / Making = Teaches how to make your own.
探す/ List = Search through database of voices. 配布ページ usually takes you directly to BOOTH, but sometimes the homepages for that character.
使う / Installation = Short tutorial that explains where to put the downloaded files in order to use the voice in COEIROINK.
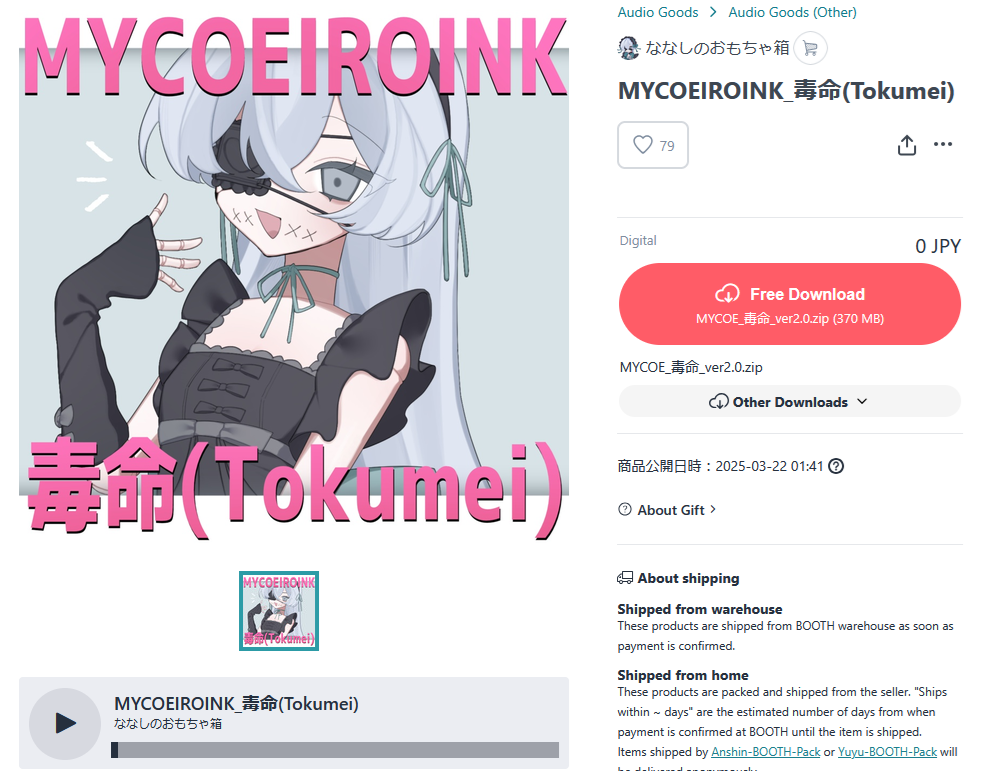
8) Pick a voice and click "Free Download". (It takes quite a long time to download because the file is big. I kept having downloads fail and it saying it would take up to 40 minutes, so I gave up and downloaded a .zip hosted on Google Drive by a different creator. You might have to experiment with different browsers and times during the day where a lot of Japanese users aren't awake or maybe even use a VPN if you really want a specific voice.)
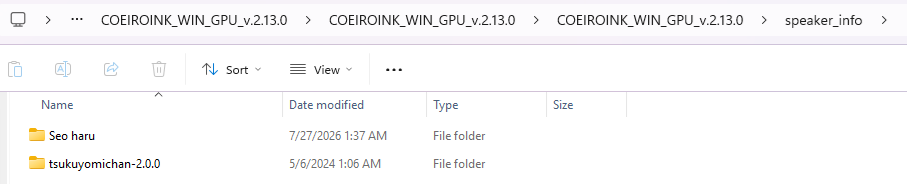
9) Unzip the file. Put the unzipped folder in "COEIROINK_WIN_GPU_v.2.13.0" > "speaker_info"
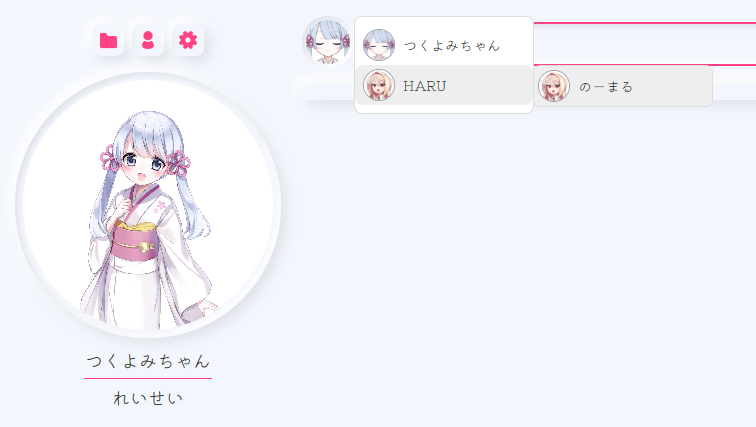
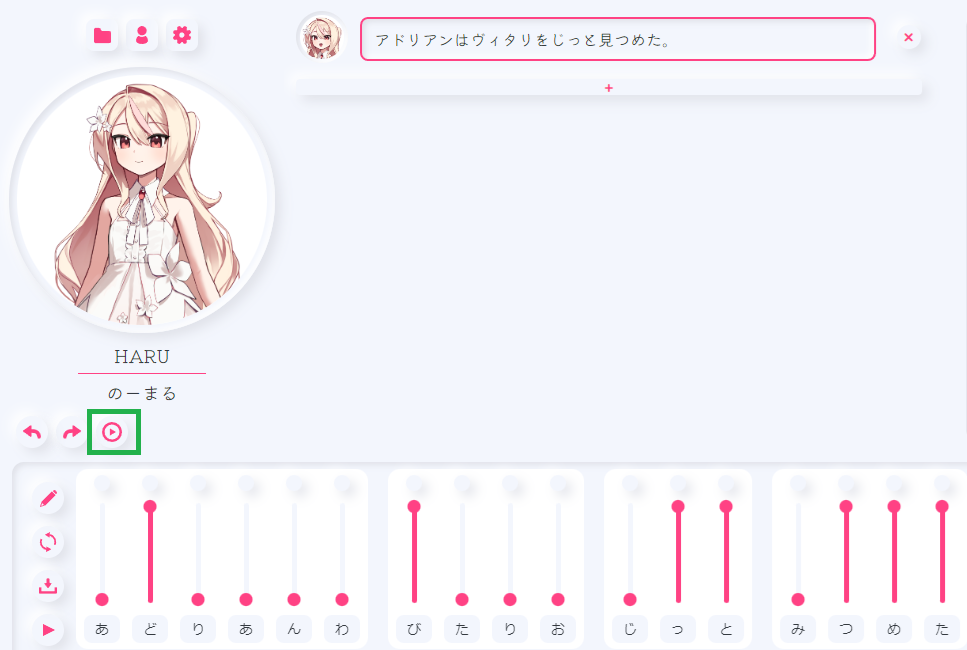
10) Click the character image thumbnail and select a different character > which emotion you want (HARU only has 1 emotion called のーまる/Normal, but there are other available characters with a lot more emotions to pick from).
COEIROINK is free. Make sure you read the terms for each character and be sure to credit the voice bank you use.
(Note: The CPU version only has one file to download via BOOTH (needs Pixiv account) or Dropbox. But I'm talking about the GPU version for this tutorial since I have an NVIDIA graphics card.)
The GPU version needs NVIDIA CUDA 12.8 installed beforehand. Link to the NVIDIA Developer website: CUDA Toolkit 12.8 Downloads
If you download COEIROINK from BOOTH, it involves downloading 4 files that you have to manually put in the same folder and you specifically need PeaZip for it, but it all comes as 1 regular zip if you download via Dropbox. So I recommend using the Dropbox link to save time.
1) Have all of the files in the same folder:
2) Run COEIROINK_WIN_GPU_v.2.13.0.exe. Let the command prompt that pops up work.
3) A new folder called "COEIROINK_WIN_GPU_v.2.13.0" will be added.
4) Inside the new folder is COEIROINKv2.exe, run it. There will be a message that says the engine is starting up.
5) A pop-up appears asking that you agree to credit COEIROINK when you make content using it. Click the blue hyperlink, it will make the Terms And Conditions page appear in your browser. Doing so enables the 同意する (Consent) button.
6) If you click the picture of the person in the upper left, there is an option to download (ダウンロード) voices that are listed on the Characters portion of the official website.
7) However, there are actually more characters you can download on BOOTH if you search for "MYCOEIROINK". (This search term includes many free voices, but some are paid. You might also see 立ち絵 artwork you can use for your videos.)
You can also see voices on the MYCOE page of the official website.
作る / Making = Teaches how to make your own.
探す/ List = Search through database of voices. 配布ページ usually takes you directly to BOOTH, but sometimes the homepages for that character.
使う / Installation = Short tutorial that explains where to put the downloaded files in order to use the voice in COEIROINK.
8) Pick a voice and click "Free Download". (It takes quite a long time to download because the file is big. I kept having downloads fail and it saying it would take up to 40 minutes, so I gave up and downloaded a .zip hosted on Google Drive by a different creator. You might have to experiment with different browsers and times during the day where a lot of Japanese users aren't awake or maybe even use a VPN if you really want a specific voice.)
9) Unzip the file. Put the unzipped folder in "COEIROINK_WIN_GPU_v.2.13.0" > "speaker_info"
10) Click the character image thumbnail and select a different character > which emotion you want (HARU only has 1 emotion called のーまる/Normal, but there are other available characters with a lot more emotions to pick from).


