Hi. I'm SeleDreams.
I've started making original music using VOCALOID a while ago, and since I moved to Linux, I didn't really have a native option to use the voicebanks I paid for.
Thankfully there are multiple ways to work around it.
The one I am going to teach in this tutorial is my favorite and the easiest for non tech savy people as it allows to use vocaloid voicebanks almost natively without having to do additional manipulations everytime you want to use one.
What you will need :
- A computer using a Linux distribution (Preferably a Debian based one as I use KDE neon 5.17 but it could still work on other distros, you would just need to adjust the wine installation commands.)
- For Piapro Studio : A legal Cryptonloid licence containing piapro studio (or the miku v4x demo that bundles piapro)
- For VOCALOID Editor : I don't own a VOCALOID1 licence at the time of writing allowing me to explain the procedure.
- For VOCALOID2 Editor : I don't own a VOCALOID2 licence at the time of writing allowing me to explain the procedure.
- For VOCALOID3 Editor : A legal VOCALOID3 Editor licence.
- For VOCALOID4 Editor : A legal VOCALOID4 Editor licence.
- For VOCALOID5 Editor : Doesn't work on Linux due to its DRM (can be installed, cannot be started due to an error of activation)
General Step 1 - Setting up your files
For this step you will just need to create a "Vocaloid" directory in your home folder.
General Step 2 - Installing Wine
Start by launching the command line interface, it will only be done once in order to install Wine.
You can use the shortcut CTRL+ALT+T to open it directly or you can search for "terminal" or "konsole" in your applications.
Once started here are the lines you will have to type to install it.
if your pc is 64 bits, start by typing this in case the 32 bit apps support is not enabled by default.
then do this step by step :
once it is done, wine should start and open a window looking a bit like the file explorer of Windows Systems.
General Step 3 - Installing Piapro Studio and a Cryptonloid
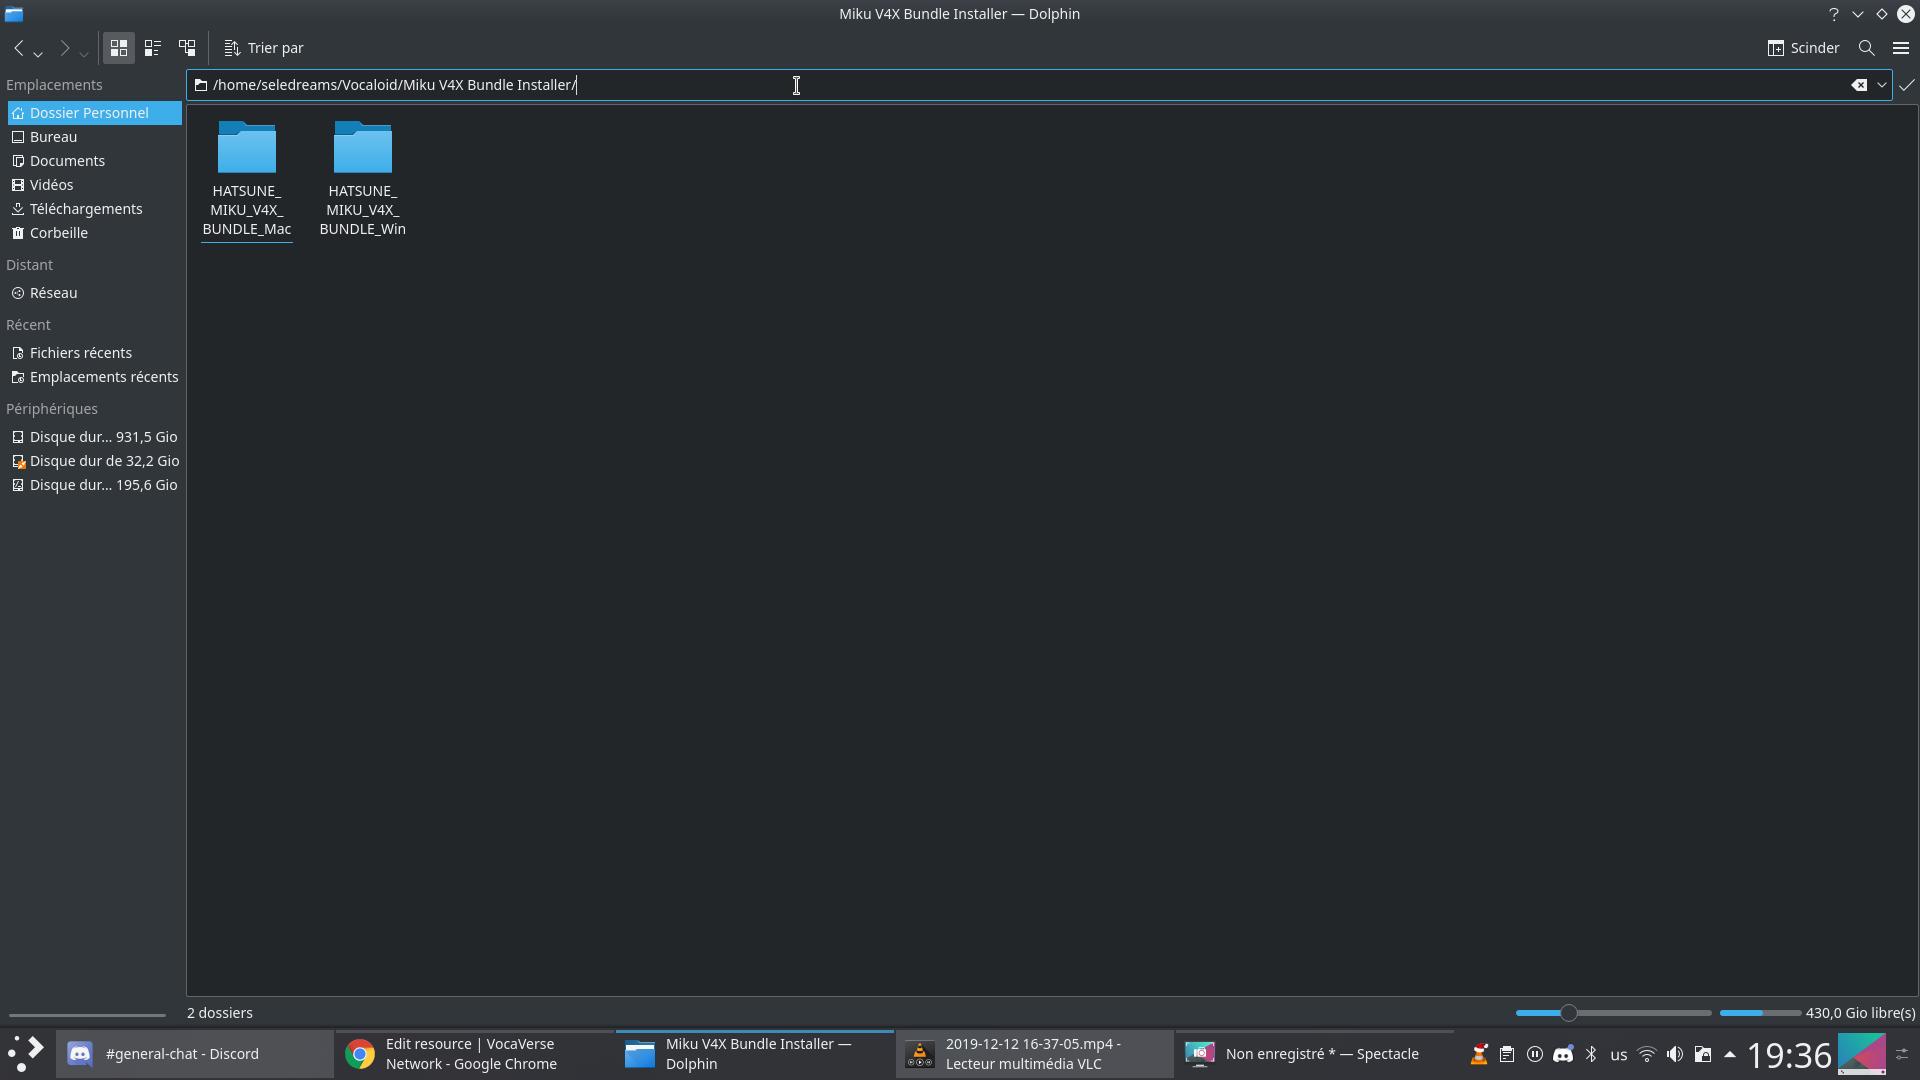
First make sure to download and extract your vocaloid voicebank in the Vocaloid directory we made earlier (create a directory inside to contain all the files since if you have multiple voicebanks the number of files will get confusing)
From the Wine Explorer, click on the '/' on the left panel, then on the right panel double click on home then on your user name.
From there, you can open on the Vocaloid directory we created earlier.

Once done you can open the directory containing your Cryptonloid and Piapro Studio ( if there's both a mac and win version, chose the win version).
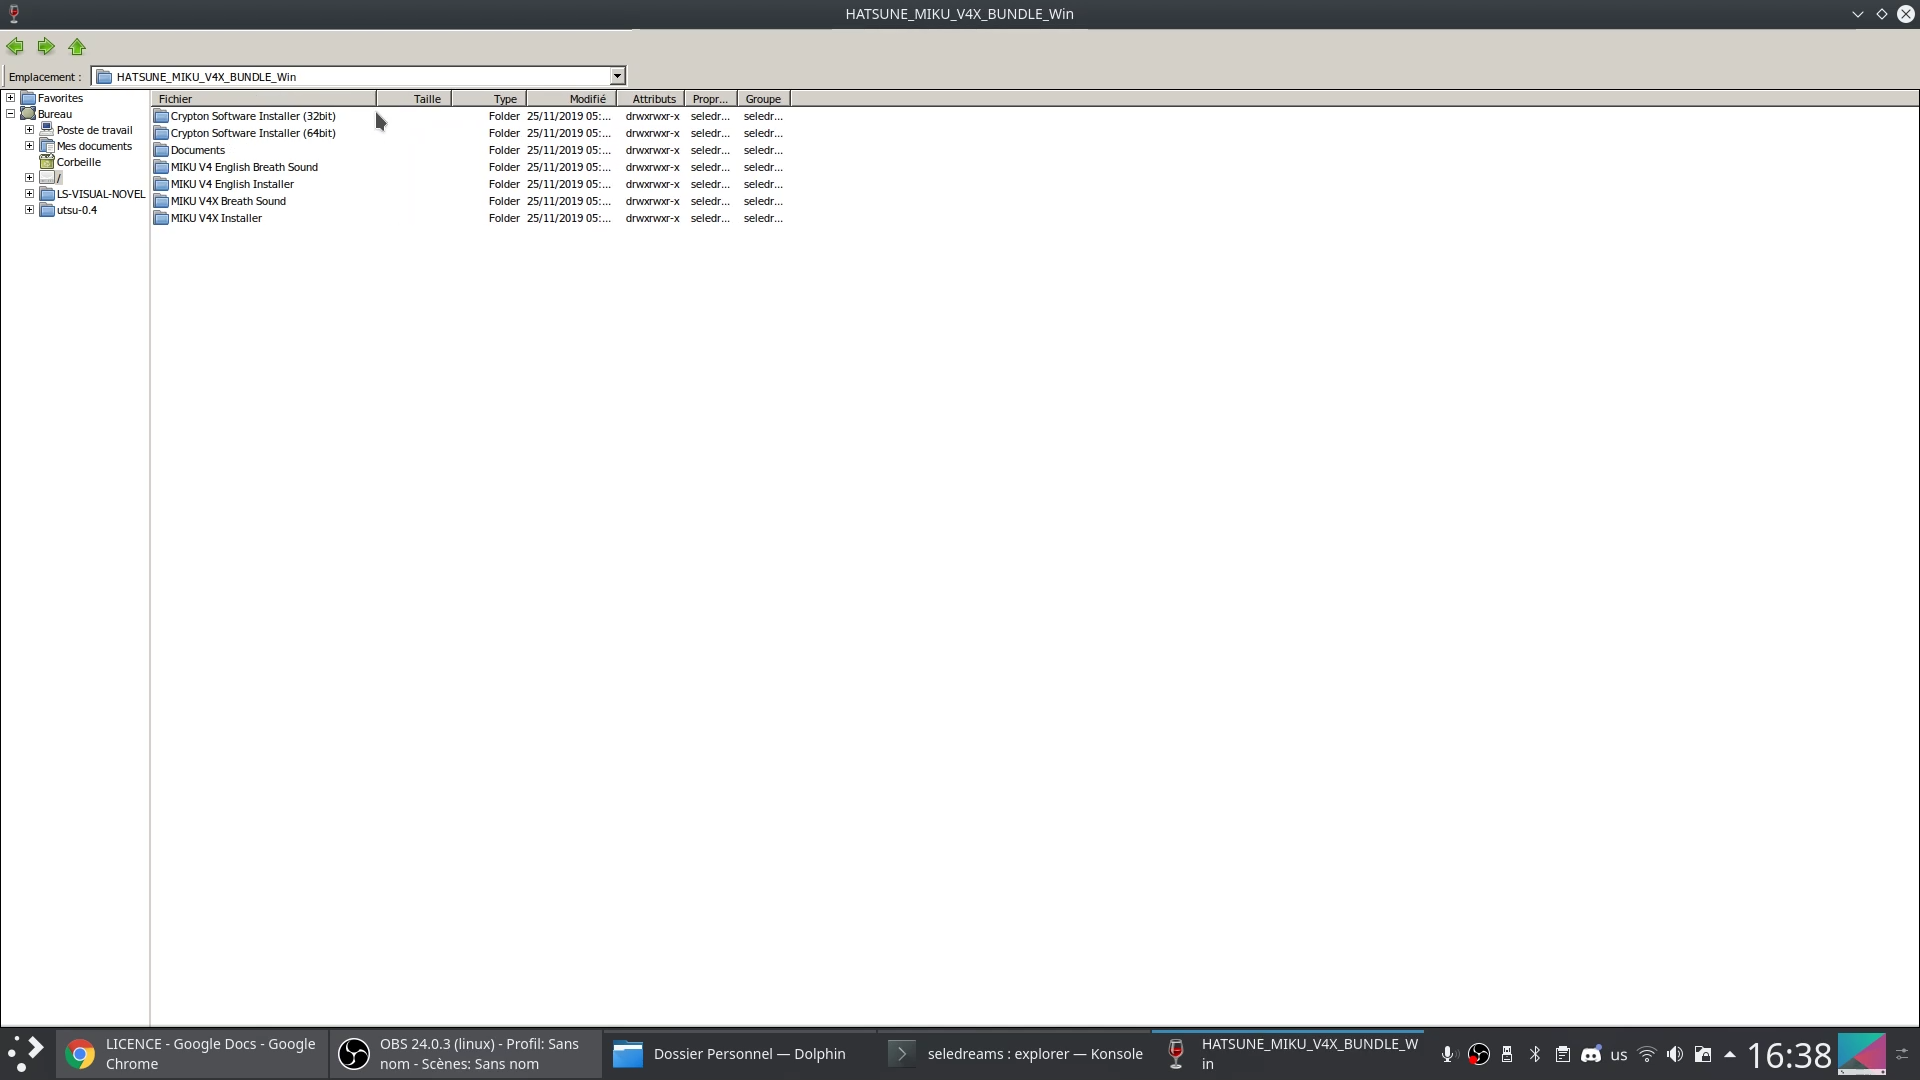
First go to the "Crypton Software Installer (32bit)" directory and double click on setup.exe (don't use the 64-bit one, Wine doesn't work well with 64-bit programs)
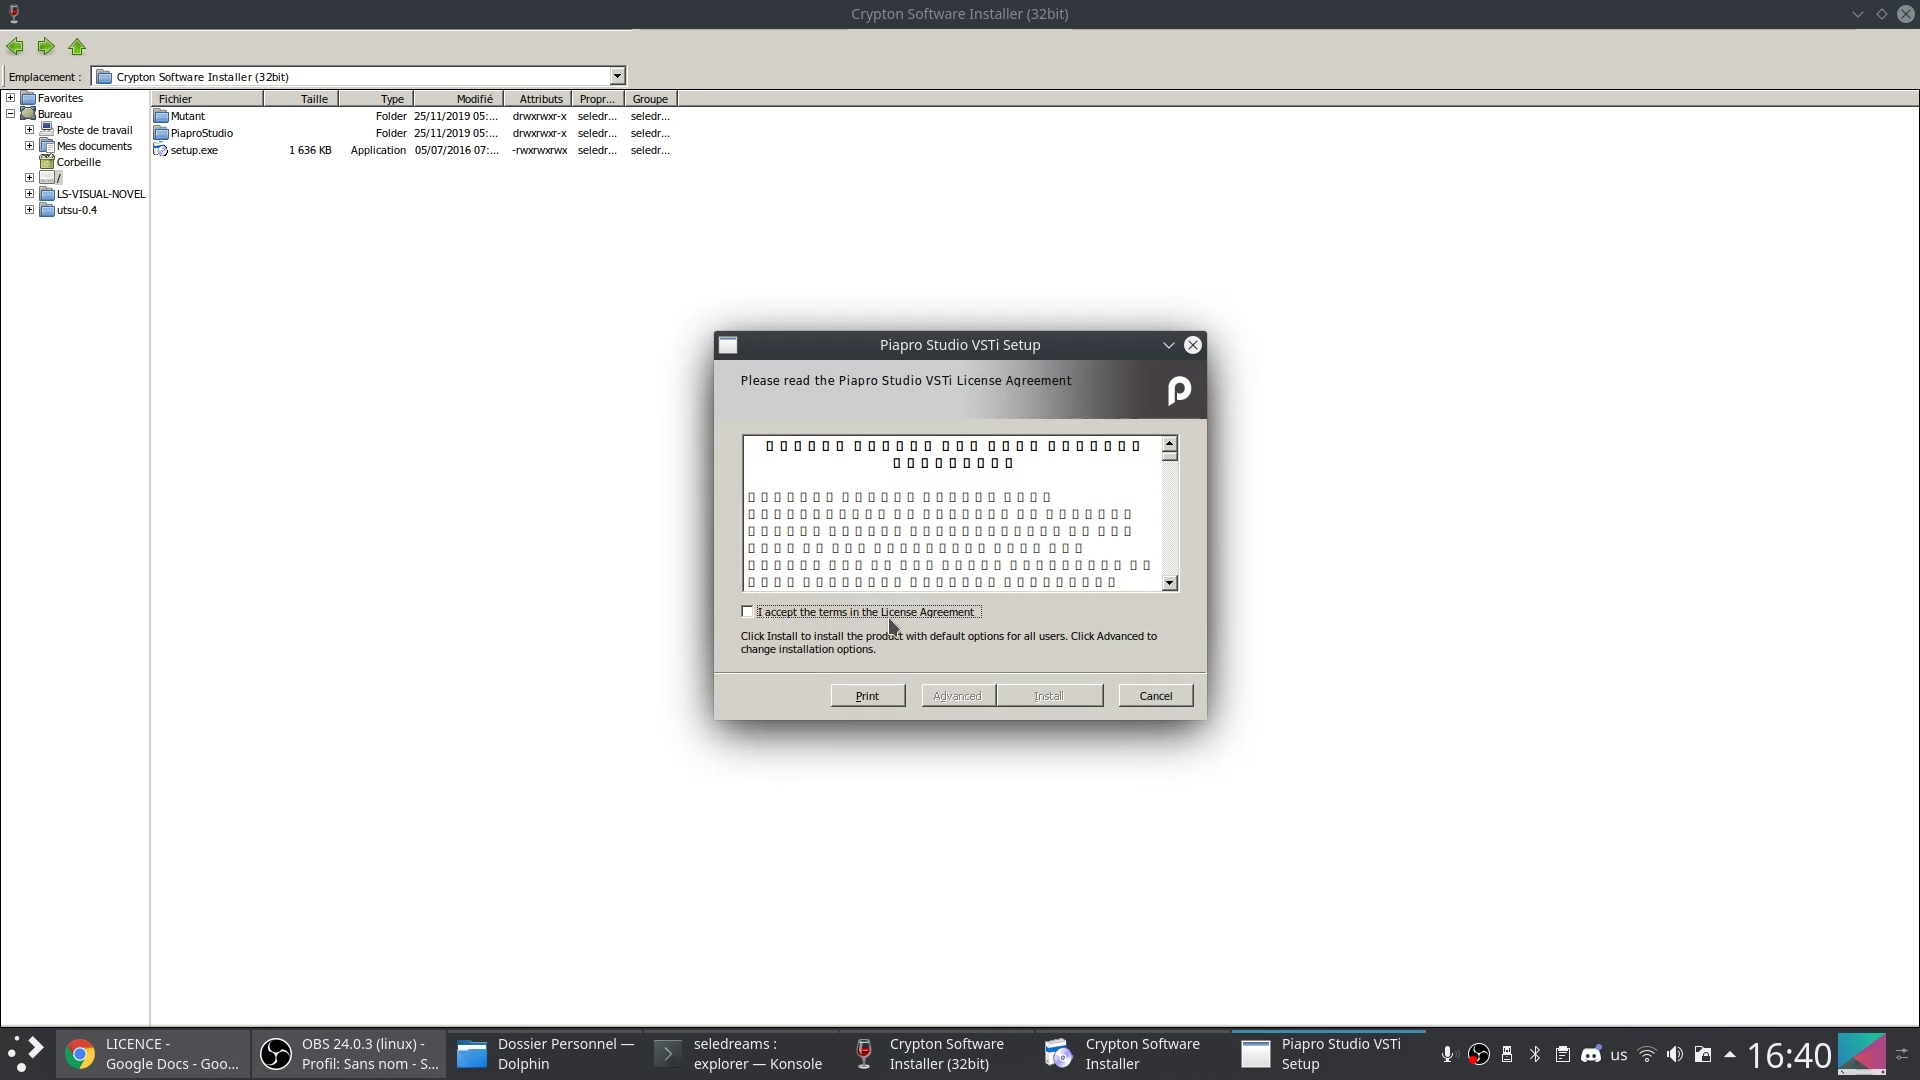
It will open it like on windows and you will just have to follow the instructions.
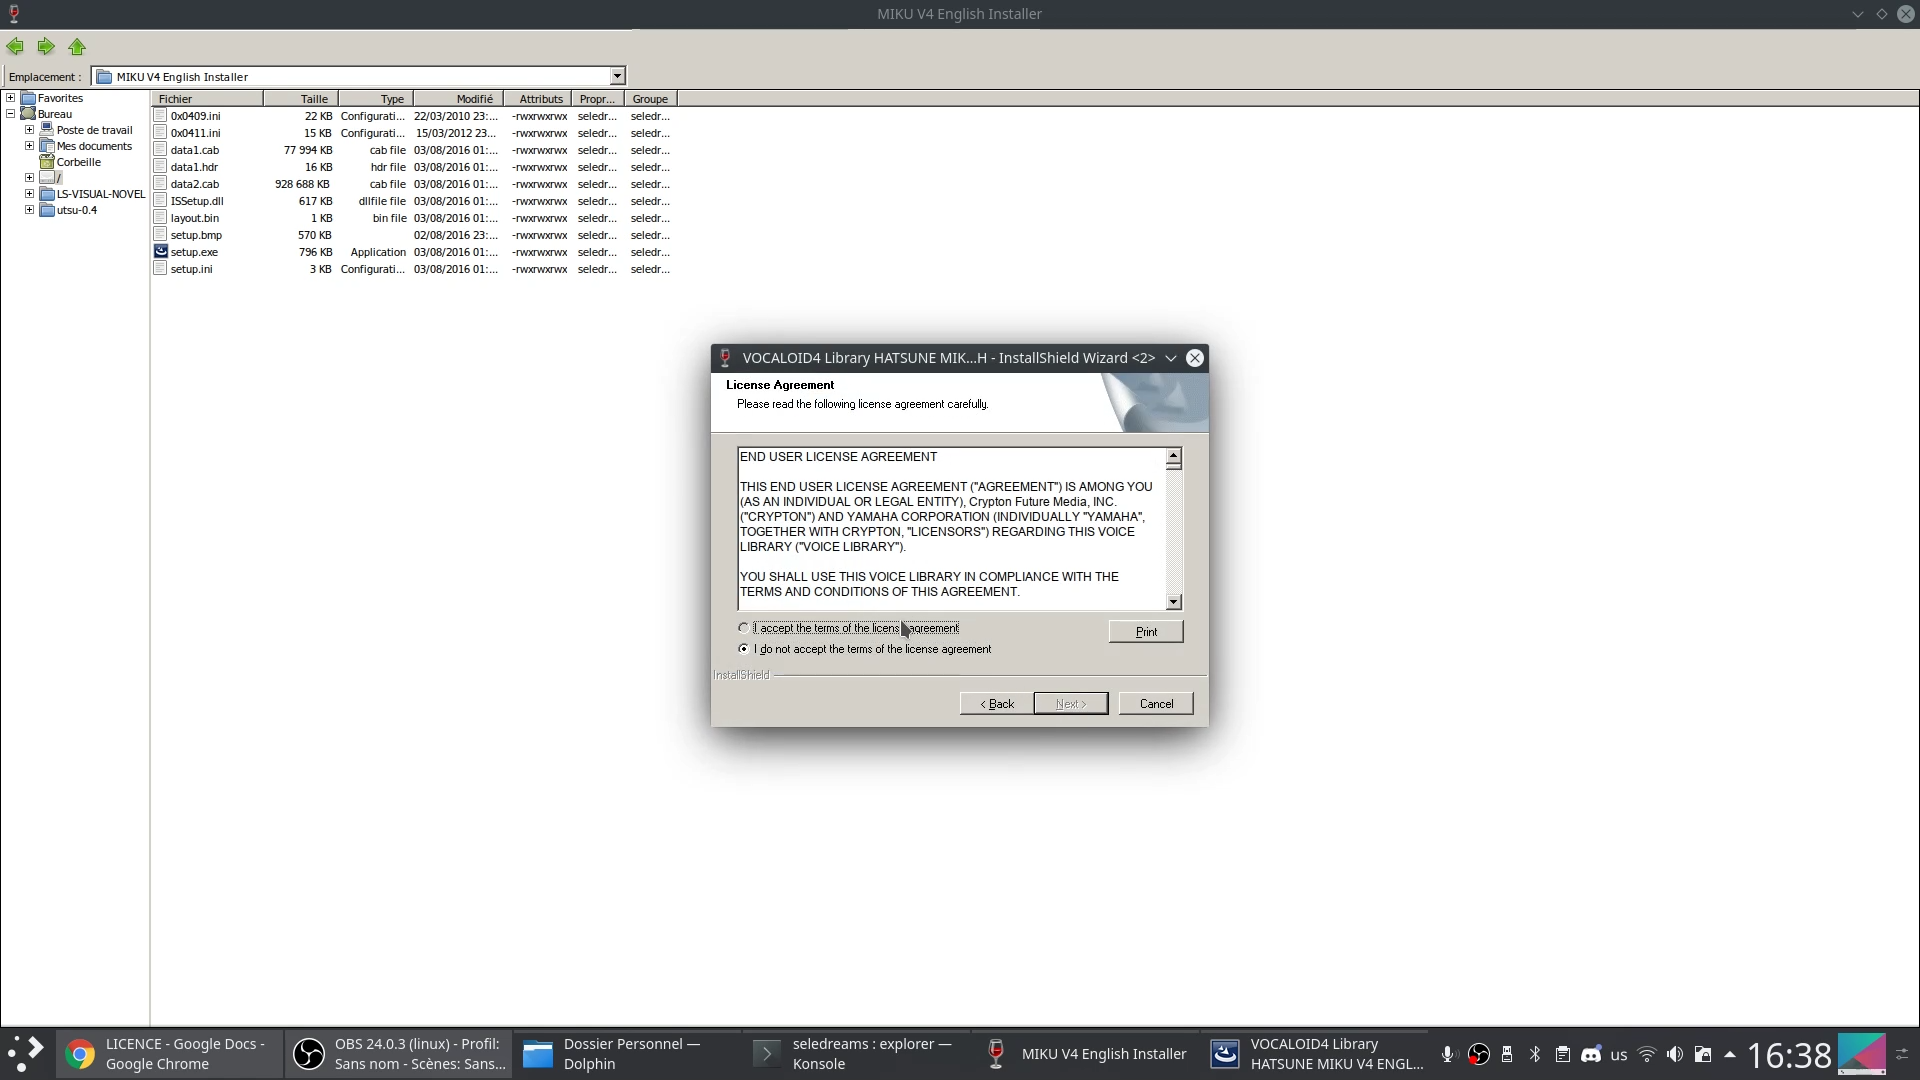
The end user licence agreement may not appear properly (it may only display empty squares) but except that, the installer works without issues.
Once done, double click on the installer of your voicebank and follow the instructions as well.
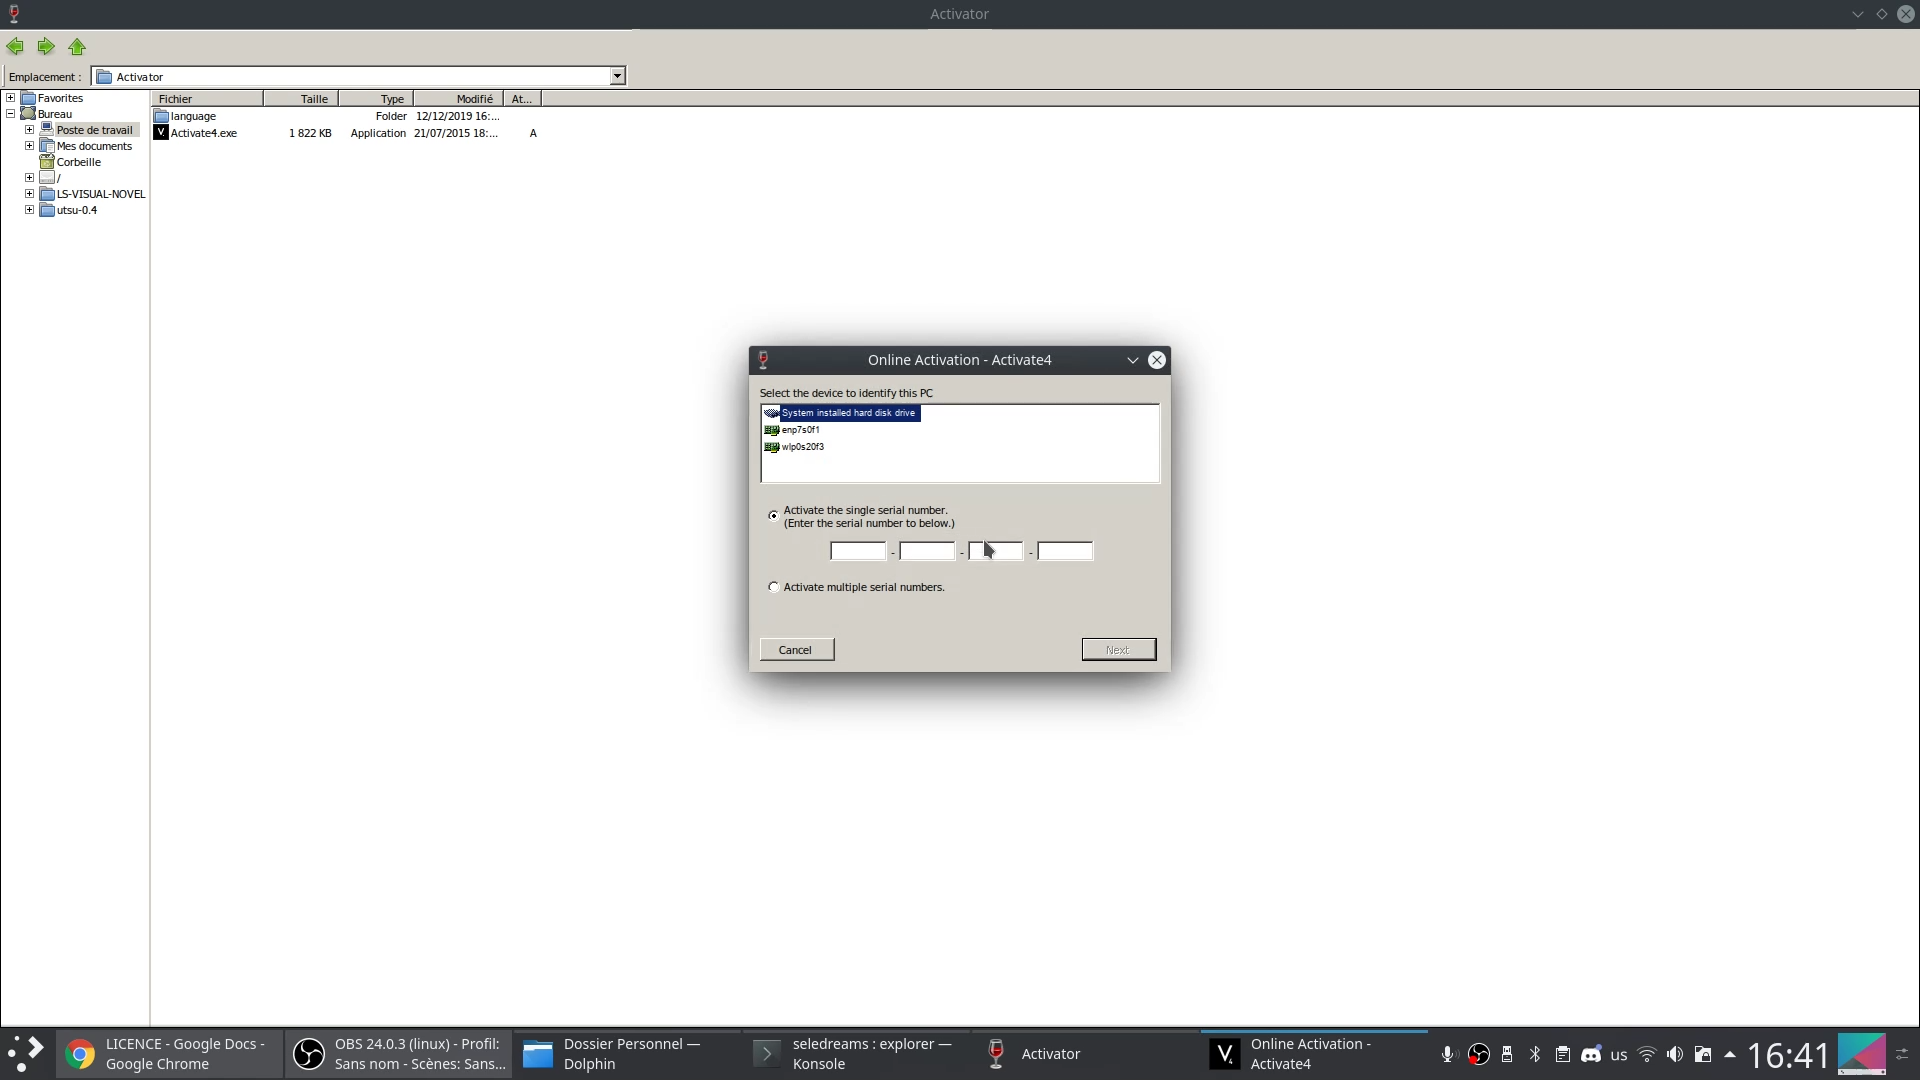
After that, copy and paste this on the top bar of wine explorer (like an url) in order to directly reach the Activate4 directory.
C:\Program Files (x86)\VOCALOID4\Activator
Here, you can double click on Activate4.exe and follow the procedure to activate your voicebank.
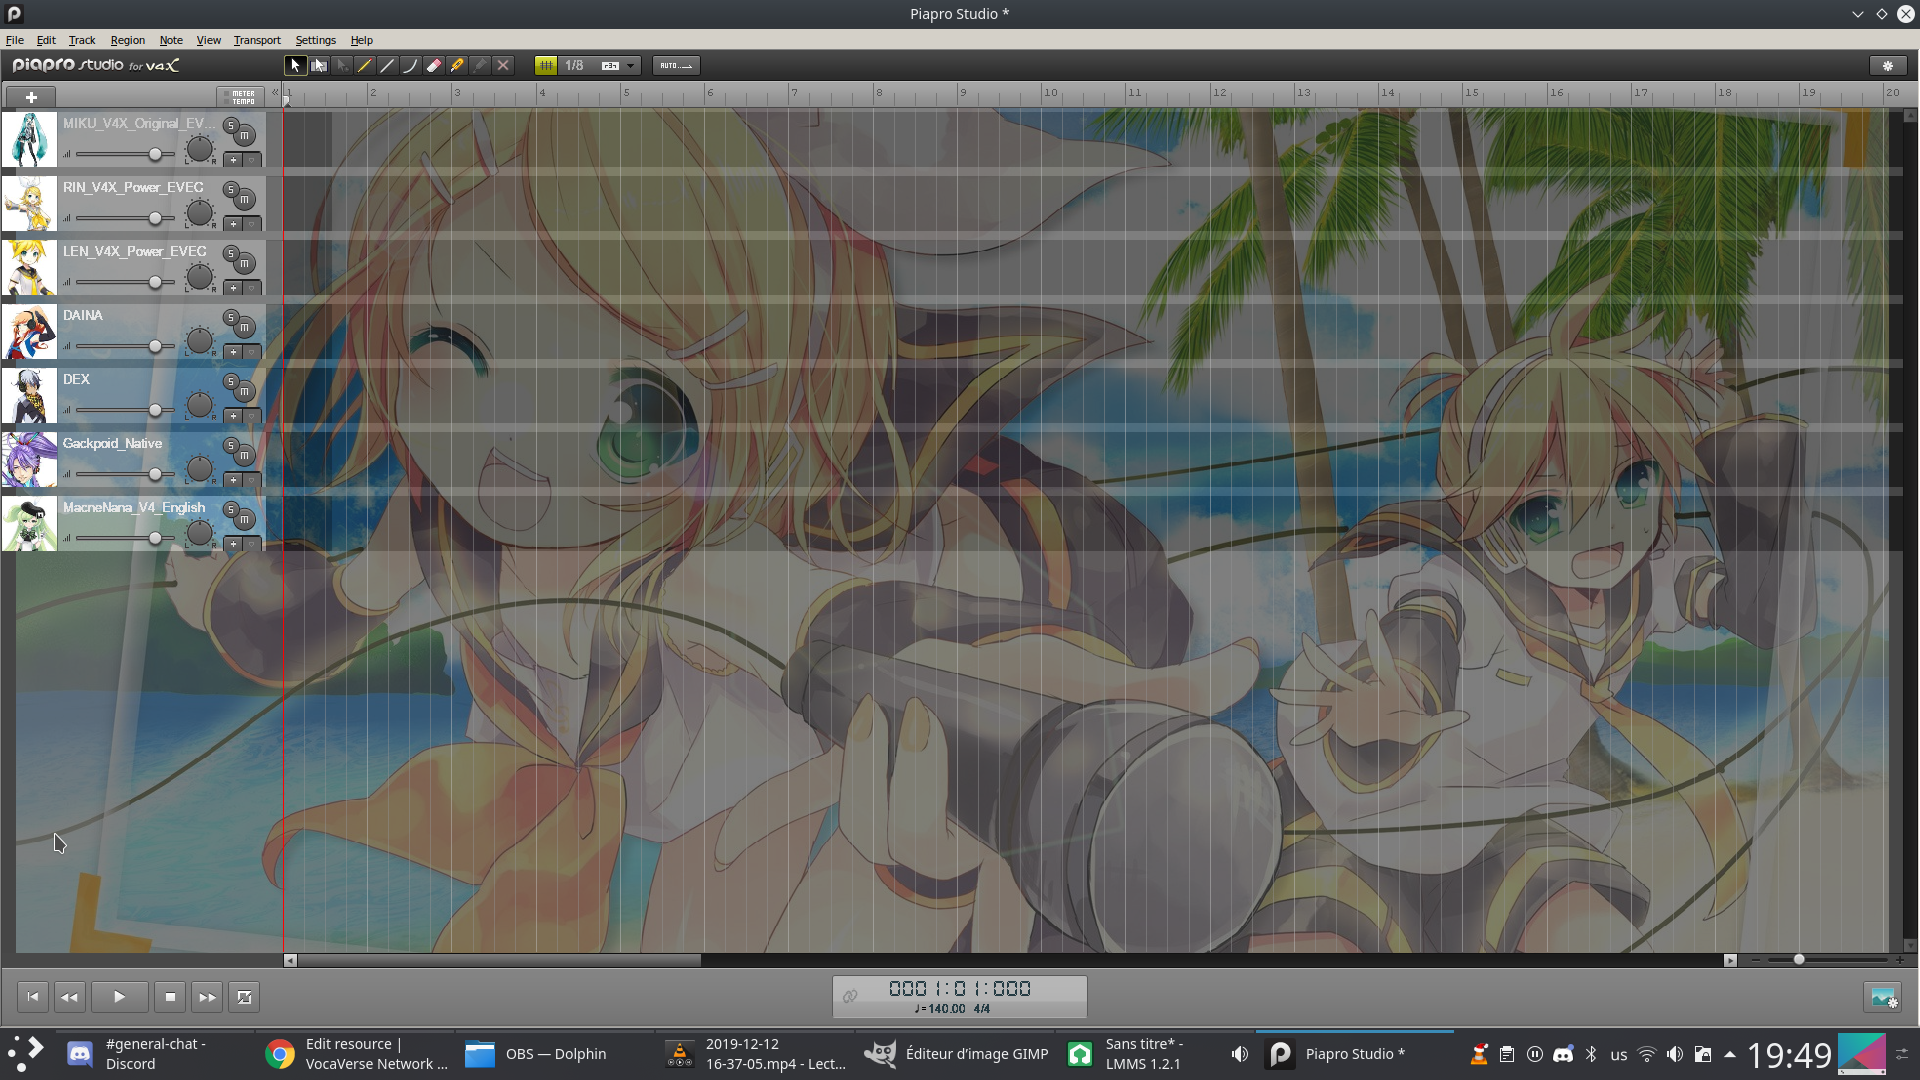
General Step 4 - Using Piapro Studio on the LMMS DAW
First of all, you will have to install the DAW named LMMS. It is the easiest option to use VOCALOIDS on Linux, it is possible to use others DAWs but they require an aditionnal step that I will explain later.
LMMS | Download
(to install it just double click on it and your distribution should suggest to install it, just click yes)
once installed, launch it, it will ask for the first time setup such as file paths etc.
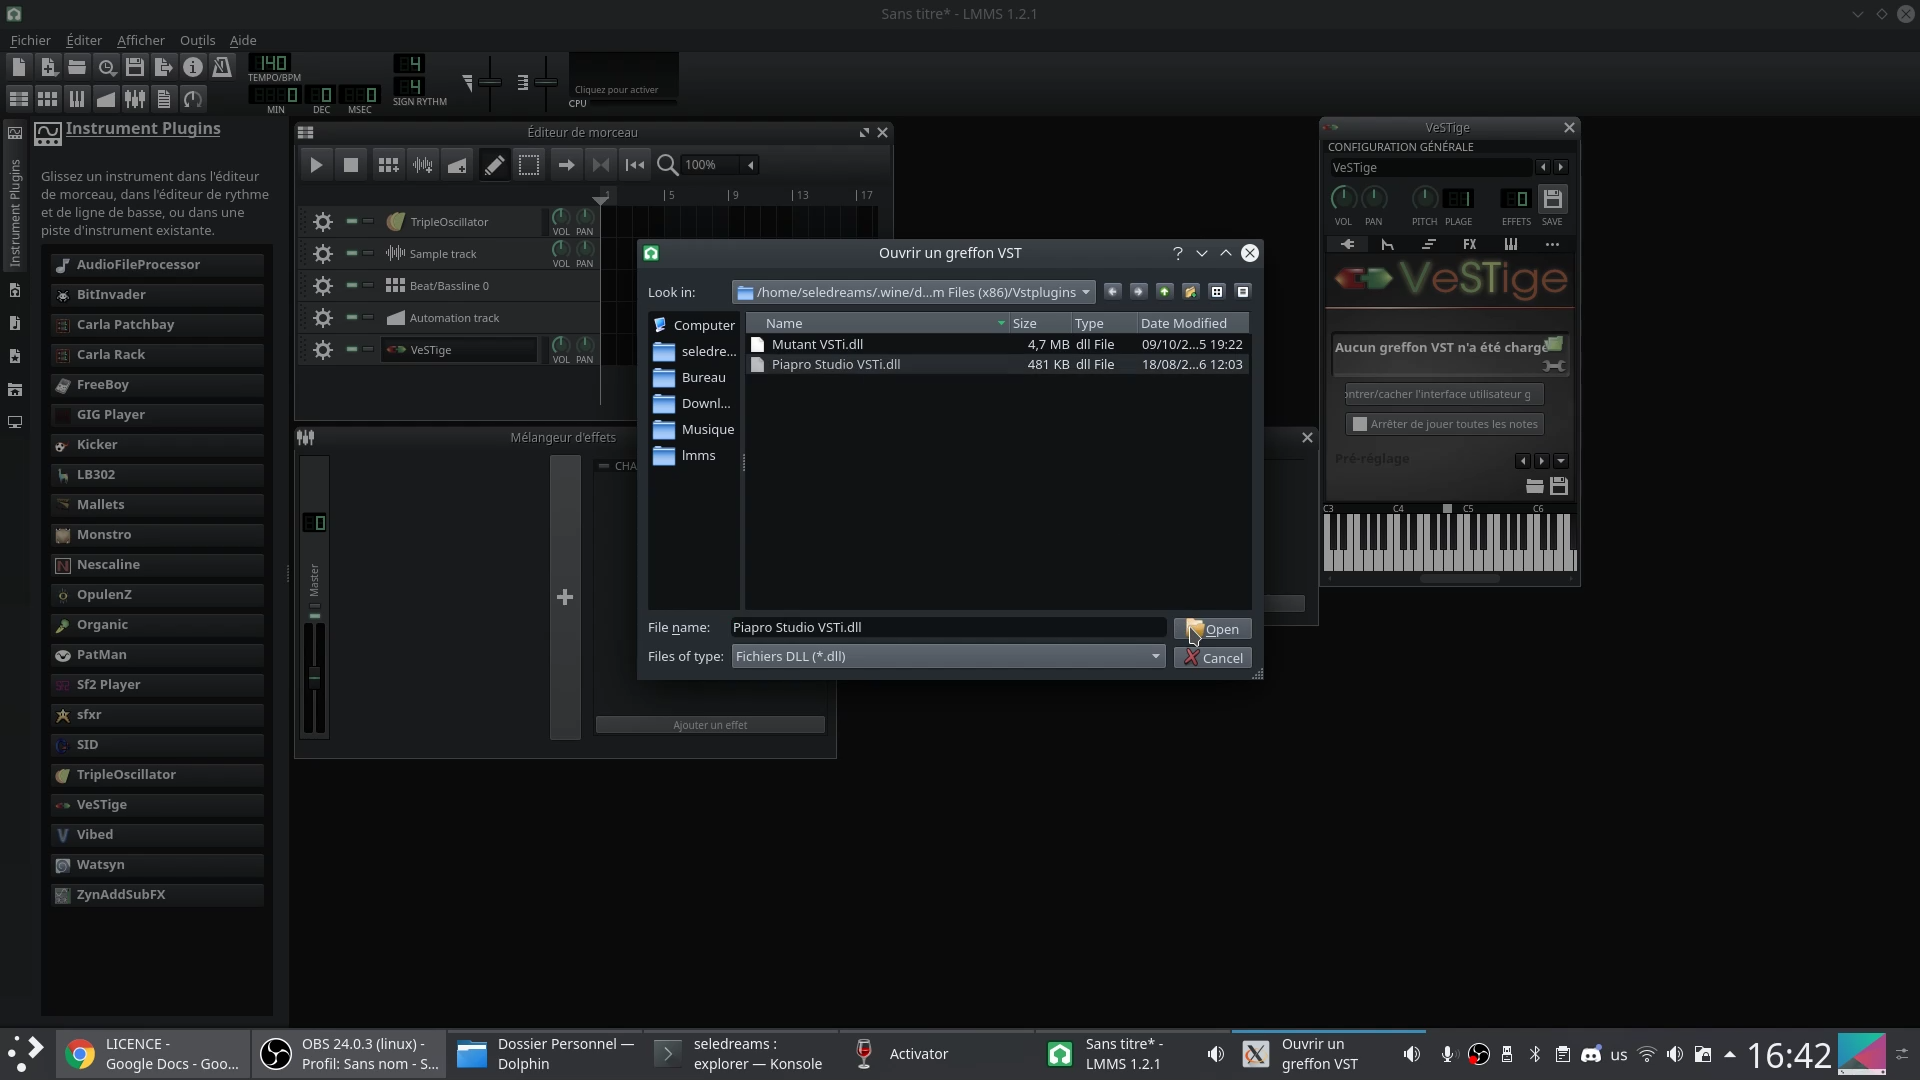
Set the VST file path to
/home/seledreams/.wine/drive_c/Program Files (x86)/Vstplugins

then apply the settings.
Now, everything is ready, you will just need to add a VeSTige instrument to the track and open the Piapro Studio.dll file to use Piapro Studio.
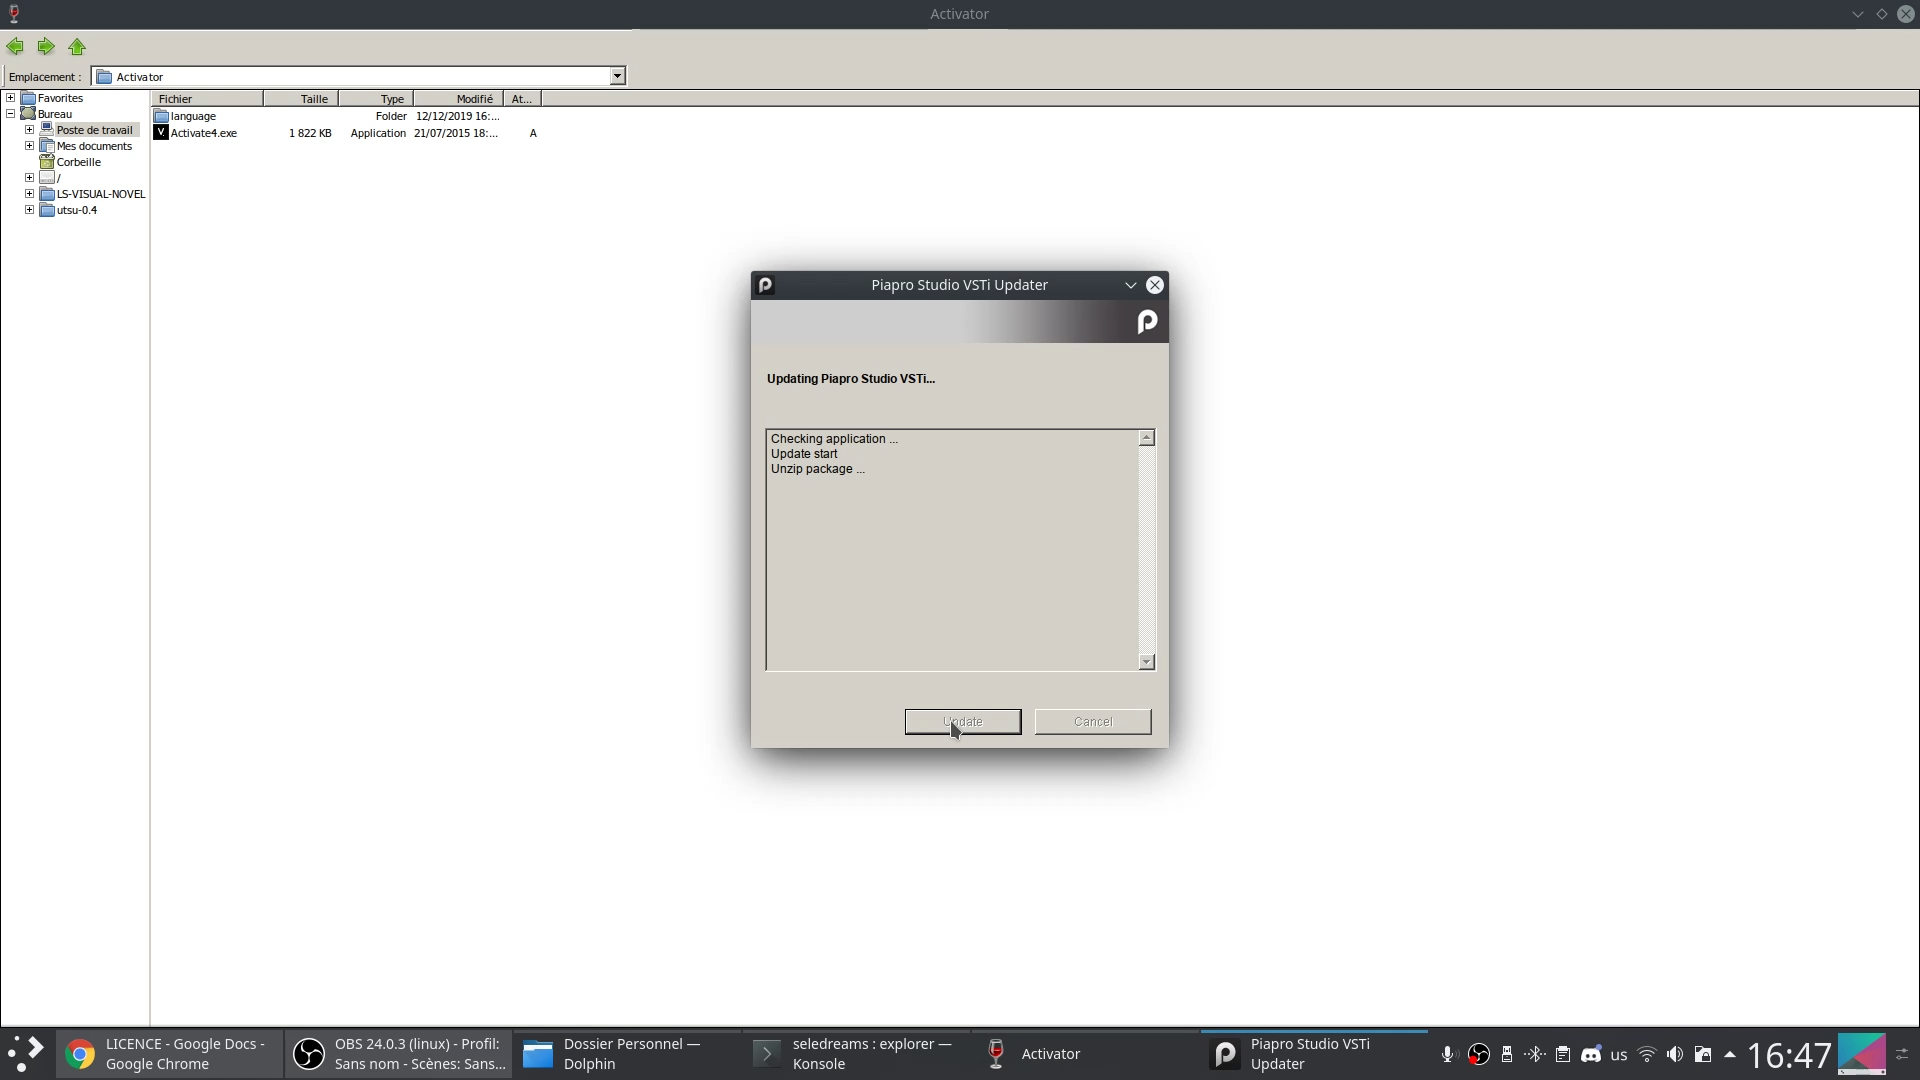
It may ask to update, just say yes, and it will update properly.
You can then start installing your other voicebanks the same way and your icons/backgrounds
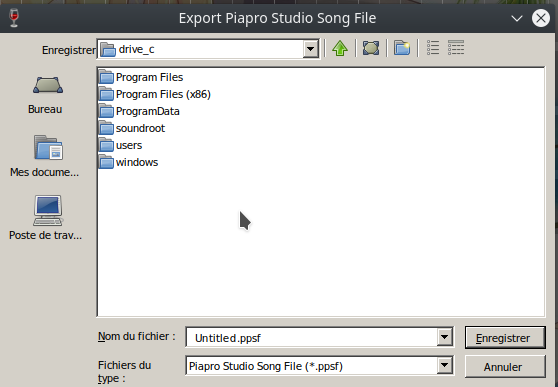
WARNING : DO NOT SAVE YOUR PROJECTS ON THE LINUX FILESYSTEM SUCH AS THE DESKTOP ETC ELSE THEY WON'T GET SAVED AND YOU WON'T BE ABLE TO RECOVER THEM
SAVE IT IN THE VIRTUAL C DRIVE NAMED drive_c (you can save inside directories in this virtual drive with no issues)
To activate on Piapro Studio third party voicebanks, it will require a trick I'll explain later in order to allow piapro studio to open the browser link activating them.
This tutorial is a work in progress, the rest is not ready yet and screenshots will be added.
I've started making original music using VOCALOID a while ago, and since I moved to Linux, I didn't really have a native option to use the voicebanks I paid for.
Thankfully there are multiple ways to work around it.
The one I am going to teach in this tutorial is my favorite and the easiest for non tech savy people as it allows to use vocaloid voicebanks almost natively without having to do additional manipulations everytime you want to use one.
What you will need :
- A computer using a Linux distribution (Preferably a Debian based one as I use KDE neon 5.17 but it could still work on other distros, you would just need to adjust the wine installation commands.)
- For Piapro Studio : A legal Cryptonloid licence containing piapro studio (or the miku v4x demo that bundles piapro)
- For VOCALOID Editor : I don't own a VOCALOID1 licence at the time of writing allowing me to explain the procedure.
- For VOCALOID2 Editor : I don't own a VOCALOID2 licence at the time of writing allowing me to explain the procedure.
- For VOCALOID3 Editor : A legal VOCALOID3 Editor licence.
- For VOCALOID4 Editor : A legal VOCALOID4 Editor licence.
- For VOCALOID5 Editor : Doesn't work on Linux due to its DRM (can be installed, cannot be started due to an error of activation)
General Step 1 - Setting up your files
For this step you will just need to create a "Vocaloid" directory in your home folder.
General Step 2 - Installing Wine
Start by launching the command line interface, it will only be done once in order to install Wine.
You can use the shortcut CTRL+ALT+T to open it directly or you can search for "terminal" or "konsole" in your applications.
Once started here are the lines you will have to type to install it.
if your pc is 64 bits, start by typing this in case the 32 bit apps support is not enabled by default.
sudo dpkg --add-architecture i386then do this step by step :
Code:
wget -nc https://dl.winehq.org/wine-builds/winehq.key
sudo apt-key add winehq.key
sudo apt-add-repository 'deb https://dl.winehq.org/wine-builds/ubuntu/ bionic main'
sudo apt update
sudo apt install --install-recommends winehq-stable
wine explorerGeneral Step 3 - Installing Piapro Studio and a Cryptonloid
First make sure to download and extract your vocaloid voicebank in the Vocaloid directory we made earlier (create a directory inside to contain all the files since if you have multiple voicebanks the number of files will get confusing)
From the Wine Explorer, click on the '/' on the left panel, then on the right panel double click on home then on your user name.
From there, you can open on the Vocaloid directory we created earlier.
Once done you can open the directory containing your Cryptonloid and Piapro Studio ( if there's both a mac and win version, chose the win version).
First go to the "Crypton Software Installer (32bit)" directory and double click on setup.exe (don't use the 64-bit one, Wine doesn't work well with 64-bit programs)
It will open it like on windows and you will just have to follow the instructions.
The end user licence agreement may not appear properly (it may only display empty squares) but except that, the installer works without issues.
Once done, double click on the installer of your voicebank and follow the instructions as well.
After that, copy and paste this on the top bar of wine explorer (like an url) in order to directly reach the Activate4 directory.
C:\Program Files (x86)\VOCALOID4\Activator
Here, you can double click on Activate4.exe and follow the procedure to activate your voicebank.
General Step 4 - Using Piapro Studio on the LMMS DAW
First of all, you will have to install the DAW named LMMS. It is the easiest option to use VOCALOIDS on Linux, it is possible to use others DAWs but they require an aditionnal step that I will explain later.
LMMS | Download
(to install it just double click on it and your distribution should suggest to install it, just click yes)
once installed, launch it, it will ask for the first time setup such as file paths etc.
Set the VST file path to
/home/seledreams/.wine/drive_c/Program Files (x86)/Vstplugins
then apply the settings.
Now, everything is ready, you will just need to add a VeSTige instrument to the track and open the Piapro Studio.dll file to use Piapro Studio.
It may ask to update, just say yes, and it will update properly.
You can then start installing your other voicebanks the same way and your icons/backgrounds
WARNING : DO NOT SAVE YOUR PROJECTS ON THE LINUX FILESYSTEM SUCH AS THE DESKTOP ETC ELSE THEY WON'T GET SAVED AND YOU WON'T BE ABLE TO RECOVER THEM
SAVE IT IN THE VIRTUAL C DRIVE NAMED drive_c (you can save inside directories in this virtual drive with no issues)
To activate on Piapro Studio third party voicebanks, it will require a trick I'll explain later in order to allow piapro studio to open the browser link activating them.
This tutorial is a work in progress, the rest is not ready yet and screenshots will be added.
